
Portfolio Project: Amechi Akpom
Capturing Network Traffic with
Wireshark in Microsoft Azure
In this demonstration, I showcase capturing and analyzing network traffic within virtual machines on Microsoft Azure using Wireshark. I handle the creation of essential resources, like a Windows 10 VM and an Ubuntu VM, and perform the configuration of network security groups to manage network flow. Throughout this guide, I spotlight various types of network traffic - ICMP, SSH, DHCP, and DNS, demonstrating Wireshark's prowess in the cloud. By the time I wrap up, I’ve equipped myself with hands-on experience in overseeing network traffic and regulating it using Network Security Groups in Microsoft Azure.
Video Demonstration

Environments and Technologies Used
Microsoft Azure: A cloud computing platform by Microsoft that provides virtual machines and other resources.
Wireshark: A widely-used, open-source network protocol analyzer that allows you to inspect and analyze network traffic in real-time or from saved capture files. In this tutorial, we will use Wireshark to capture and observe various types of network traffic.
Windows 10 VM: A virtual machine running the Windows 10 operating system, used as the primary environment for installing Wireshark and capturing network traffic.
Ubuntu VM: A virtual machine running the Ubuntu Linux operating system, used as a target for network traffic generated from the Windows 10 VM.
Network Security Groups (NSGs): A feature in Microsoft Azure that allows you to control inbound and outbound network traffic to and from your Azure resources. In this tutorial, we will use NSGs to control ICMP traffic between the Windows 10 and Ubuntu VMs.
Remote Desktop Protocol (RDP): A proprietary protocol developed by Microsoft that allows users to remotely access a Windows computer or virtual machine. In this tutorial, we will use RDP to connect to the Windows 10 VM.
SSH (Secure Shell): A cryptographic network protocol for operating network services securely over an unsecured network. In this tutorial, we will use SSH to establish a secure connection between the Windows 10 and Ubuntu VMs.
PuTTY: A free and open-source terminal emulator and SSH client for Windows. In this tutorial, we will use PuTTY to establish an SSH connection to the Ubuntu VM.
ICMP (Internet Control Message Protocol): A network-layer protocol used by network devices to send error messages and operational information. In this tutorial, we will observe ICMP traffic between the Windows 10 and Ubuntu VMs.
DHCP (Dynamic Host Configuration Protocol): A network management protocol used to automate the assignment of IP addresses and other network configuration parameters to network devices. In this tutorial, we will observe DHCP traffic within the Windows 10 VM.
DNS (Domain Name System): A hierarchical and decentralized naming system for computers, services, or other resources connected to the internet or a private network. In this tutorial, we will observe DNS traffic within the Windows 10 VM.
Setting Up the Environment
In this section, we will create the necessary resources in Microsoft Azure, including a Resource Group, a Windows 10 Virtual Machine (VM), and a Linux (Ubuntu) VM. We will also observe the Virtual Network within Network Watcher.
Create a Resource Group
Sign in to the Azure Portal.
In the left-hand menu, click on "Resource Groups."
Click "Add" to create a new Resource Group.
Fill in the required details, including a unique name and your preferred region.
Click "Review + create" and then "Create" to confirm.

Create a Windows 10 Virtual Machine (VM)
In the Azure Portal, click on "Create a resource" in the left-hand menu.
Search for "Windows 10" and select the appropriate VM image.
Click "Create" to start the VM creation process.
Fill in the required details, such as VM name, region, and admin username and password.
Under the "Resource Group" section, select the Resource Group created earlier.
For the Virtual Network (Vnet) and Subnet, let the VM create a new one.
Complete the remaining VM configuration settings as needed.
Click "Review + create" and then "Create" to confirm.

Create a Linux (Ubuntu) VM
In the Azure Portal, click on "Create a resource" in the left-hand menu.
Search for "Ubuntu" and select the appropriate VM image.
Click "Create" to start the VM creation process.
Fill in the required details, such as VM name, region, and admin username and password.
Under the "Resource Group" section, select the Resource Group created earlier.
For the Virtual Network (Vnet) and Subnet, select the one created while setting up the Windows 10 VM.
Complete the remaining VM configuration settings as needed.
Click "Review + create" and then "Create" to confirm.
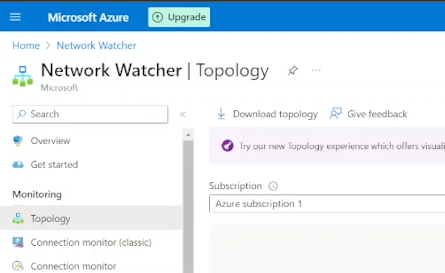
Observe Your Virtual Network within Network Watcher
In the Azure Portal, click on "Network Watcher" in the left-hand menu.
Select the Virtual Network you created earlier.
Observe the details of your Virtual Network, including the connected VMs and subnets.

Observing ICMP Traffic
In this section, we will use Wireshark to observe ICMP traffic between the Windows 10 and Ubuntu VMs, and also between the Windows 10 VM and a public website. We will also demonstrate how Network Security Group rules can be used to control ICMP traffic.
Connect to Windows 10 VM and Install Wireshark
Use Remote Desktop to connect to your Windows 10 Virtual Machine.
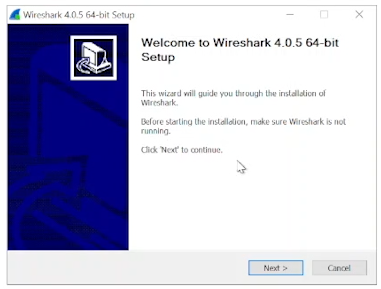
Within your Windows 10 Virtual Machine, download Wireshark from the official website.
Install Wireshark following the installation wizard instructions.
Filter and Observe ICMP Traffic
Open Wireshark and start a new capture.
Set the filter to "icmp" to display only ICMP traffic.
Retrieve the private IP address of the Ubuntu VM from the Azure Portal.
Open Command Prompt or PowerShell in the Windows 10 VM and ping the Ubuntu VM using the command: ping <Ubuntu_VM_IP>
Observe the ping requests and replies within Wireshark.
Ping a Public Website and Observe Traffic
From the Windows 10 VM, attempt to ping a public website (e.g., www.amazon.com) using the command: ping www.amazon.com
Observe the ICMP traffic between the Windows 10 VM and the public website in Wireshark.

Control ICMP Traffic Using Network Security Group
Initiate a perpetual/non-stop ping from your Windows 10 VM to your Ubuntu VM using the command: ping -t <Ubuntu_VM_IP>
In the Azure Portal, navigate to the Network Security Group (NSG) associated with your Ubuntu VM.
Click on "Inbound security rules" in the left menu.
Click on the "+ Add" button in the top menu.
Configure the new rule as follows:
Source: Any
Source Port Ranges: *
Destination: Any
Service: Custom
Destination Port Ranges: *
Protocol: ICMP
Action: Deny
Click "Add" to create the rule.
Observe the ICMP traffic in Wireshark and the command line Ping activity, which should be interrupted due to the new rule.


Re-enable ICMP Traffic and Observe the Result
In the Azure Portal, navigate to the NSG associated with your Ubuntu VM.
Locate the ICMP rule you created earlier and delete it to re-enable ICMP traffic.
Observe the ICMP traffic in Wireshark and the command line Ping activity, which should resume.

Stop the Ping Activity
In the Command Prompt or PowerShell, press Ctrl+C to stop the continuous ping activity.
Observing SSH Traffic
In this section, we will use Wireshark to observe SSH traffic between the Windows 10 and Ubuntu VMs. We will establish an SSH connection and execute commands within the Ubuntu VM, monitoring the SSH traffic in Wireshark.
Filter for SSH Traffic in Wireshark
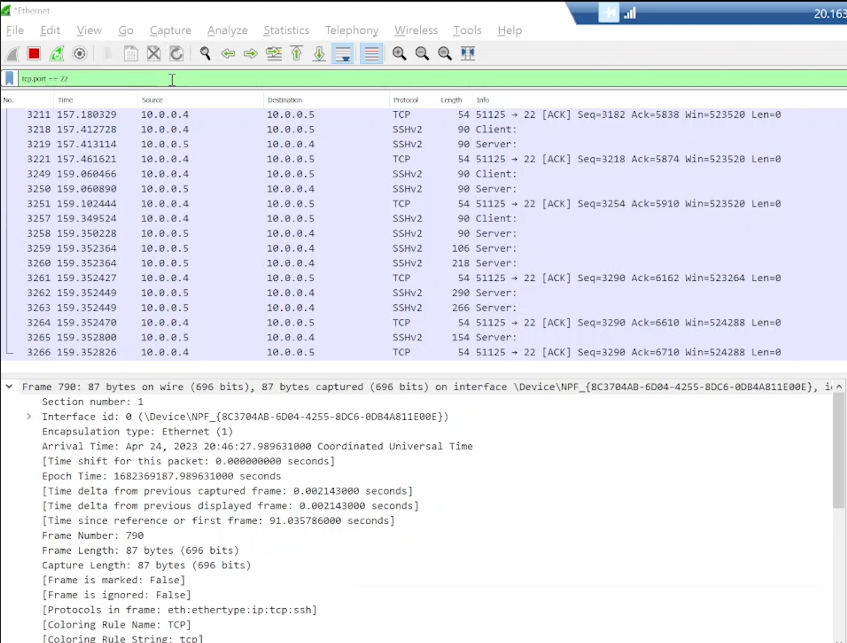
In Wireshark, update the filter to "ssh" to display only SSH traffic.
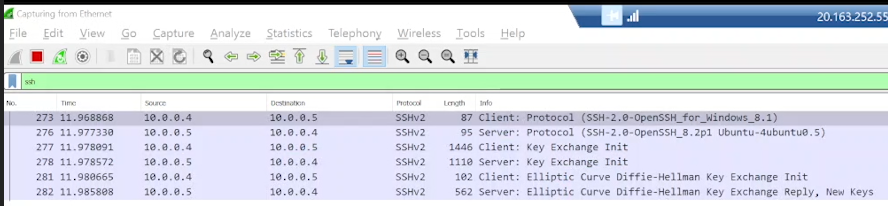
Establish an SSH Connection
If you don't have an SSH client installed on your Windows 10 VM, download and install one such as PuTTY.
Open the SSH client and enter the private IP address of your Ubuntu VM.
Connect to the Ubuntu VM using the appropriate username and password.
Observe the SSH traffic in Wireshark as the connection is established.
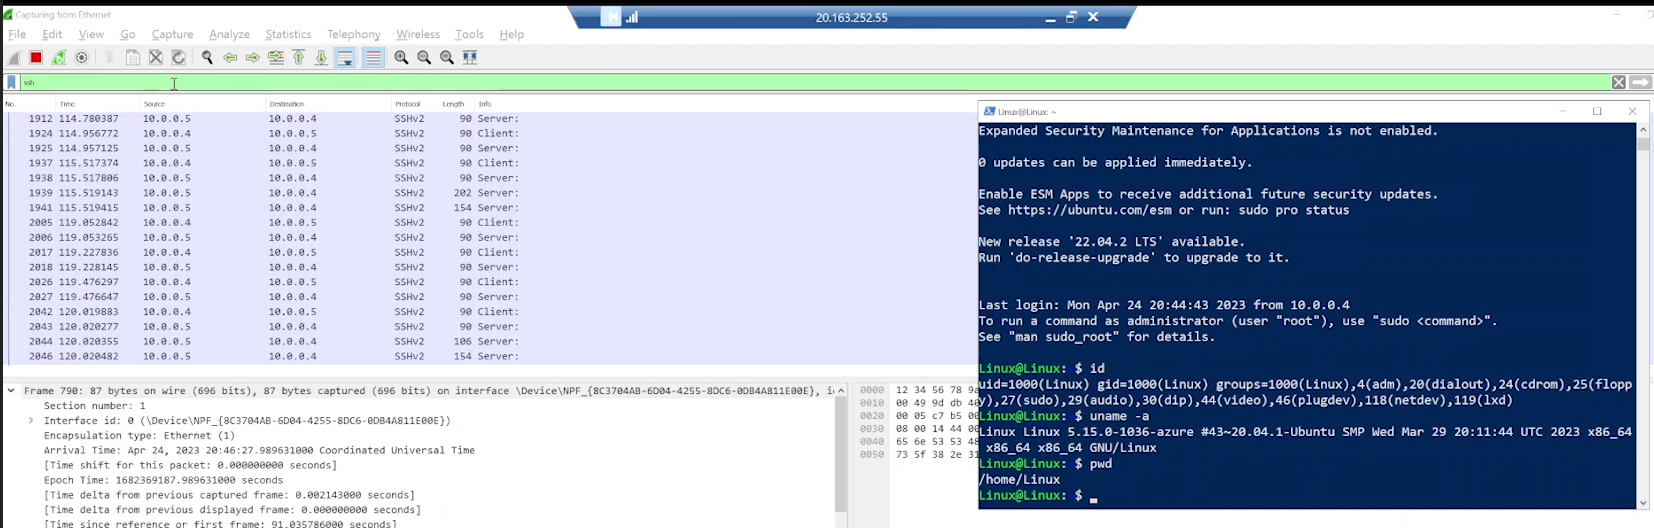
Execute Commands and Observe SSH Traffic
In the SSH session, type the following command and press [Enter]: ls -lasth
Observe the SSH traffic in Wireshark.
Type the following command and press [Enter]: touch hi.txt
Observe the SSH traffic in Wireshark.
Close the SSH Connection
In the SSH session, type exit and press [Enter] to close the connection.
Observe the SSH traffic in Wireshark as the connection is closed.
Observing DNS Traffic
In this section, we will use Wireshark to observe DNS traffic within the Windows 10 VM. We will use the nslookup command to query the IP addresses of two websites and monitor the DNS traffic in Wireshark.
Filter for DNS Traffic in Wireshark
In Wireshark, update the filter to "dns" to display only DNS traffic.

Query IP Addresses Using nslookup
Open Command Prompt or PowerShell in the Windows 10 VM.
Type the following command and press [Enter]: nslookup ufc.com
Observe the DNS traffic in Wireshark as the IP address for ufc.com is resolved.

