
Portfolio Project: Amechi Akpom
Basic Data Management with Azure Storage
In this demonstration, I lead you down the path of data management in Microsoft Azure. I begin by crafting a Storage Account within an existing Resource Group, then create a Container inside that Storage Account. I then upload a file from my local device into the Container. I'll also dive into editing the file right within the Container via the Azure Portal and then download the refined file back to my device. By the time I finish, I've carved out a roadmap on how to store, oversee, and retrieve data using Azure Blob Storage.
Video Demonstration

Environments and Technologies Used
Microsoft Azure: A cloud computing platform by Microsoft that provides virtual machines and other resources.
Azure Storage Account: A cloud-based storage service provided by Azure that supports different types of data, such as blobs, files, queues, and tables.
Azure Blob Storage: A part of the Azure Storage Account service, used for storing and managing binary large objects (blobs), such as images, documents, and videos.
Containers: A unit within Azure Blob Storage that is used to store and organize blobs.
Azure Resource Groups: A logical grouping of resources in Azure, used to organize and manage resources based on their lifecycle and their relationship to each other.
HTTP/HTTPS: The underlying protocols used for communication between your local device and the Azure Portal. These protocols enable secure data transmission when uploading, downloading, or editing files in the Azure Blob Storage.
Azure Blob Service REST API: An API that provides programmatic access to Azure Blob Storage, allowing developers to interact with the storage service through HTTP/HTTPS requests.
Create a Storage Account within an existing Resource Group
Log in to the Azure Portal (https://portal.azure.com) using your credentials.
In the top search field, search for "Storage accounts."

Click the "Create storage account" button to create a new Storage Account.

In the "Basics" tab, select your Subscription and the existing Resource Group from the drop-down menus.
Enter a unique name for your Storage Account.
Choose the desired location (region) for your Storage Account.
Select the performance tier, account kind, and replication options according to your requirements.
Click "Review" to review your settings, and then click "Create" to create the Storage Account.
Create a Container inside
the Storage Account
Once the Storage Account is created, navigate to it by clicking "Go to resource."
Under "Data storage" in the left-hand menu, click "Containers."
Click the "+Container" button to create a new Container.
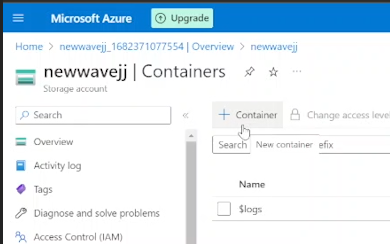
Enter a name for your Container and set the desired access level [ex: Private (no anonymous access)]. Click "Create" when done.

Upload a file from your local device into the Container
Click on the newly created Container to open it.
In the "Upload blob" window, click the “Browse for files” link to browse and select the file you want to upload from your local device. Click "Upload" to start the upload process.

Edit the file within the Container
(within the Azure Portal)
Click on the file you just uploaded.
Click on the three dots next to the file name and select “View/edit”.

Make the desired changes to the file and click "Save."
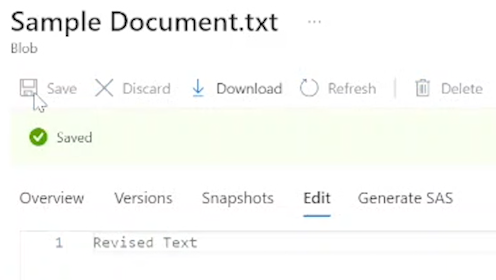
Download the revised file to your local device and confirm the revisions
Click on the file you just edited.
Click the "Download" button in the toolbar to download the file to your local device.

Open the downloaded file on your local device and confirm that the revisions you made in the Azure Portal are present.